
Create Collections
Step-by-step guide on creating your collections
Creating collections is a crucial operation on the Vantage platform. Here's a visual guide on how you can create them. For your first collection, we offer a step-by-step process. For additional collections, you can use the side window; the possibilities remain the same.
Feel free to explore both approaches in the following guide!
What are Collections?
If you need more information on collections, including the different types Vantage supports and how they affect your use case, check our Collections documentation page.
Creating Your First Collection
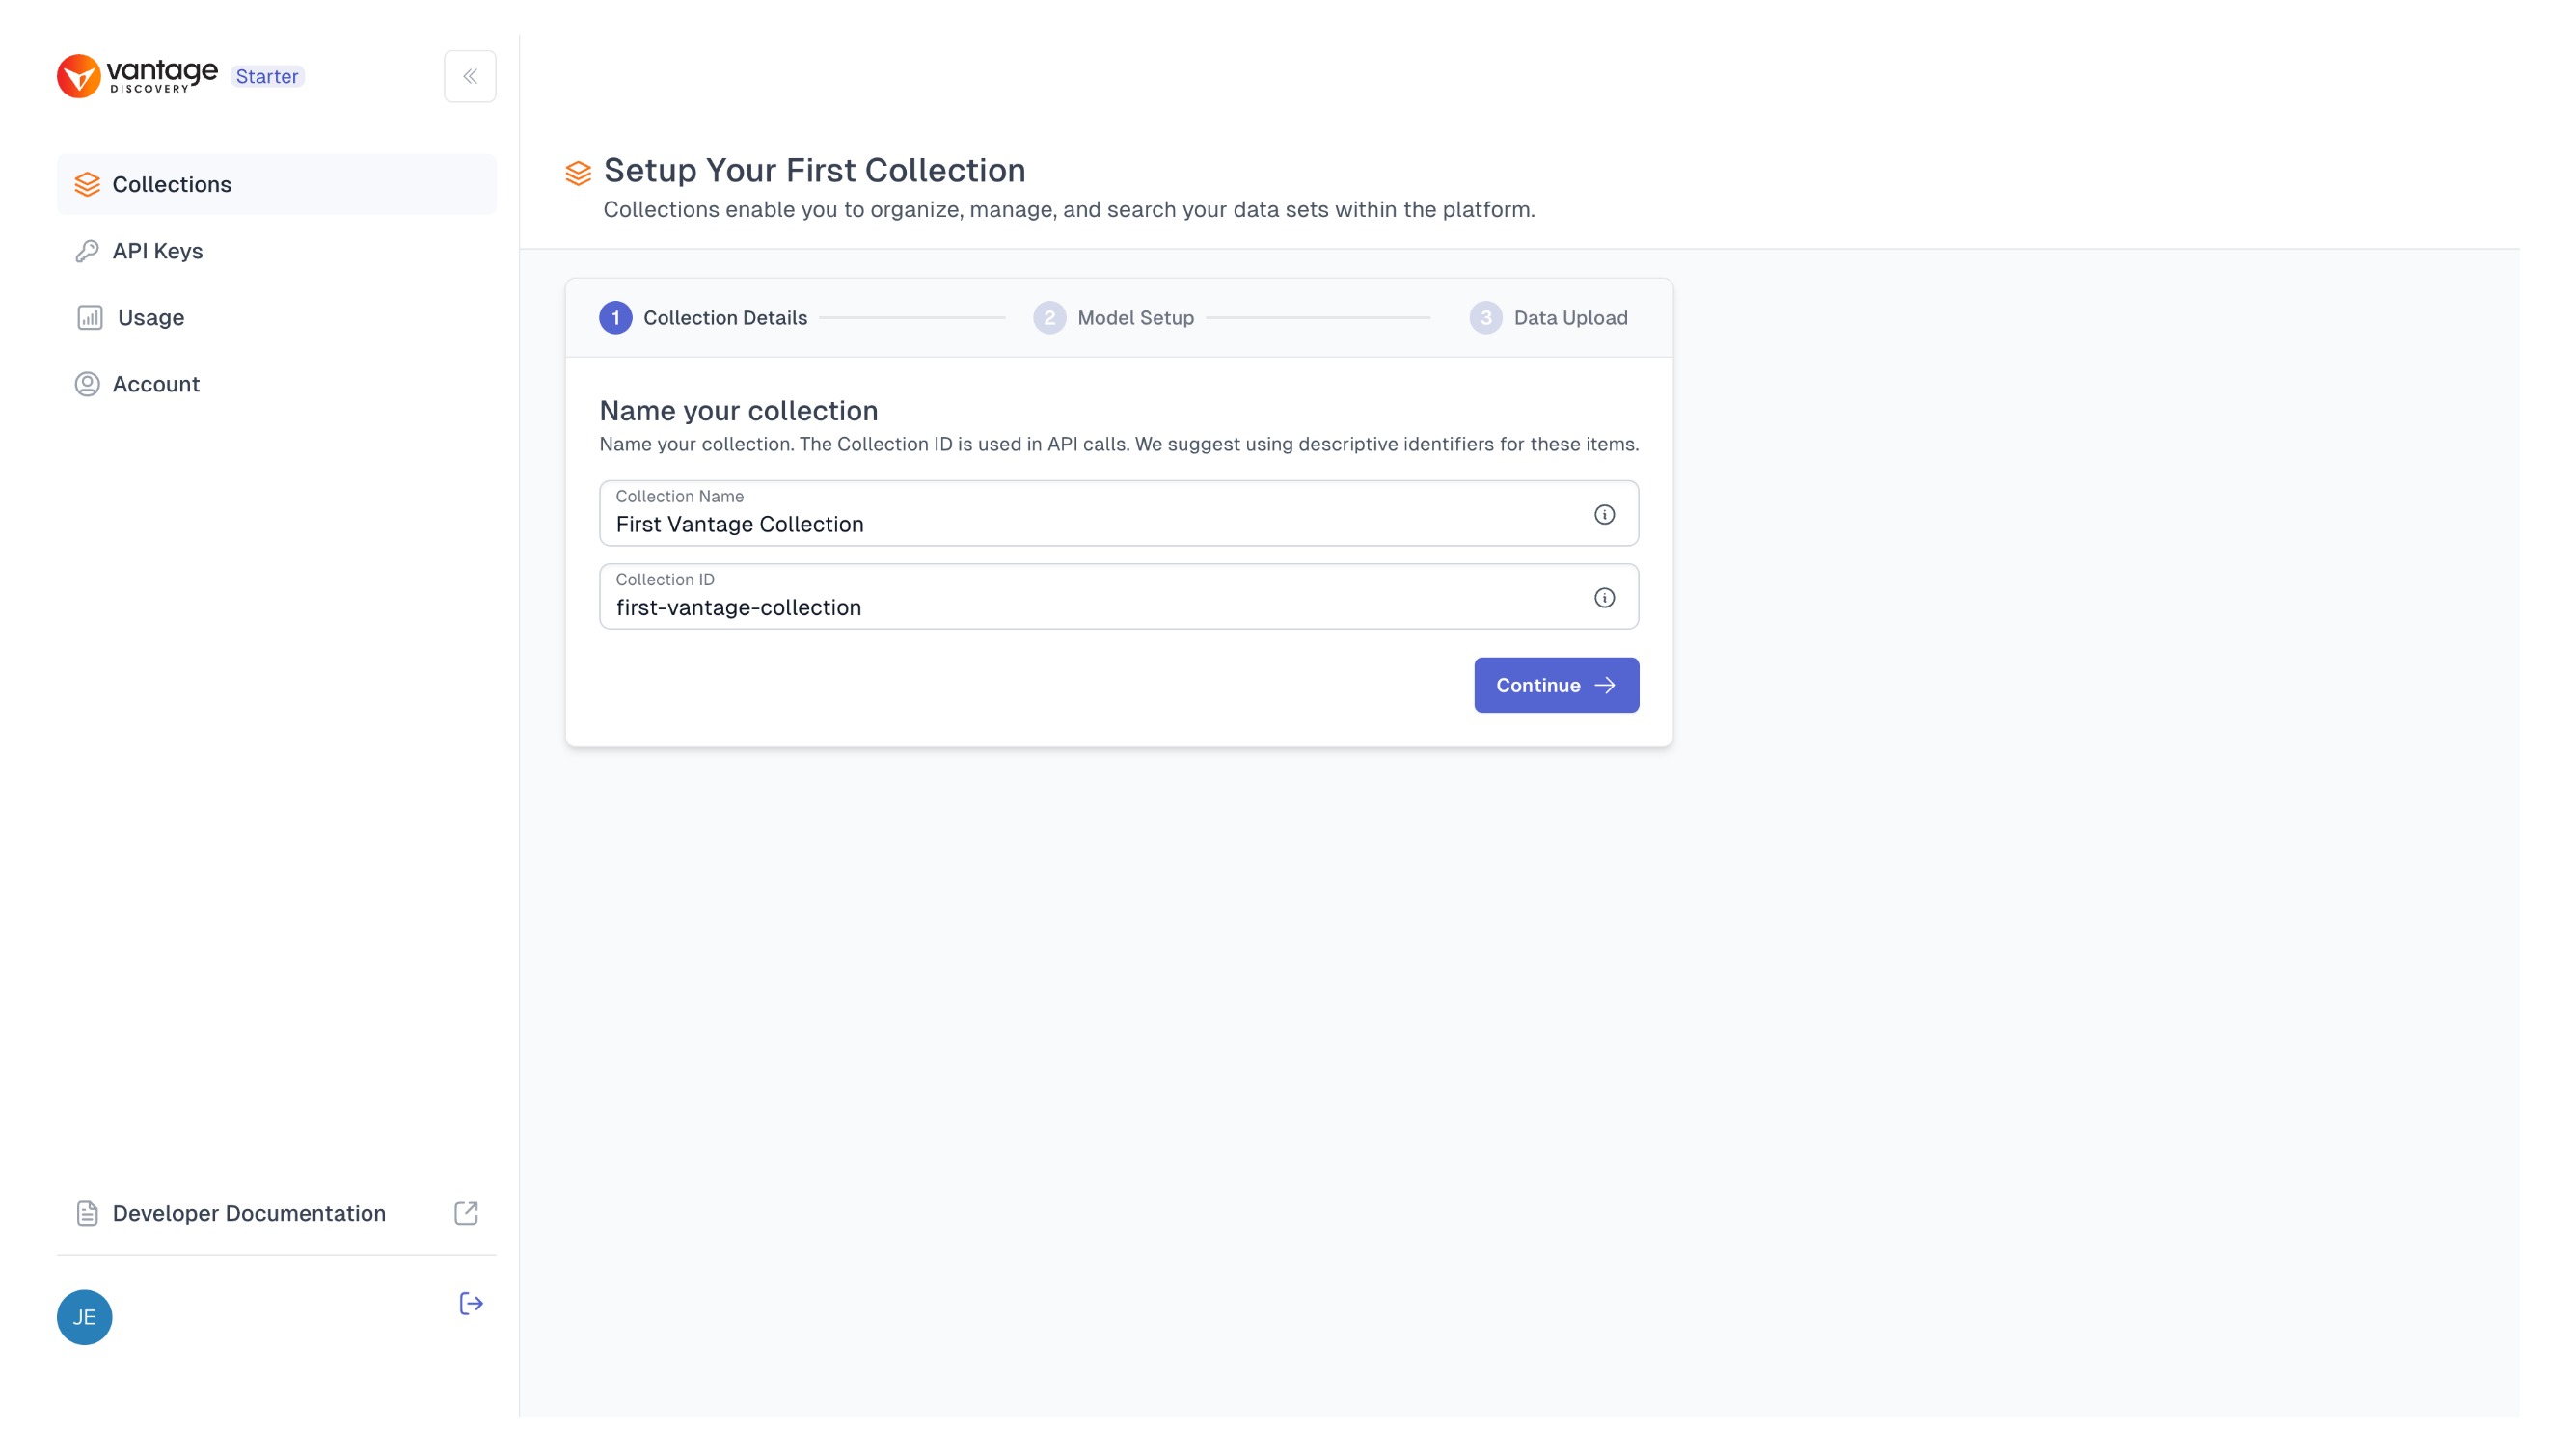
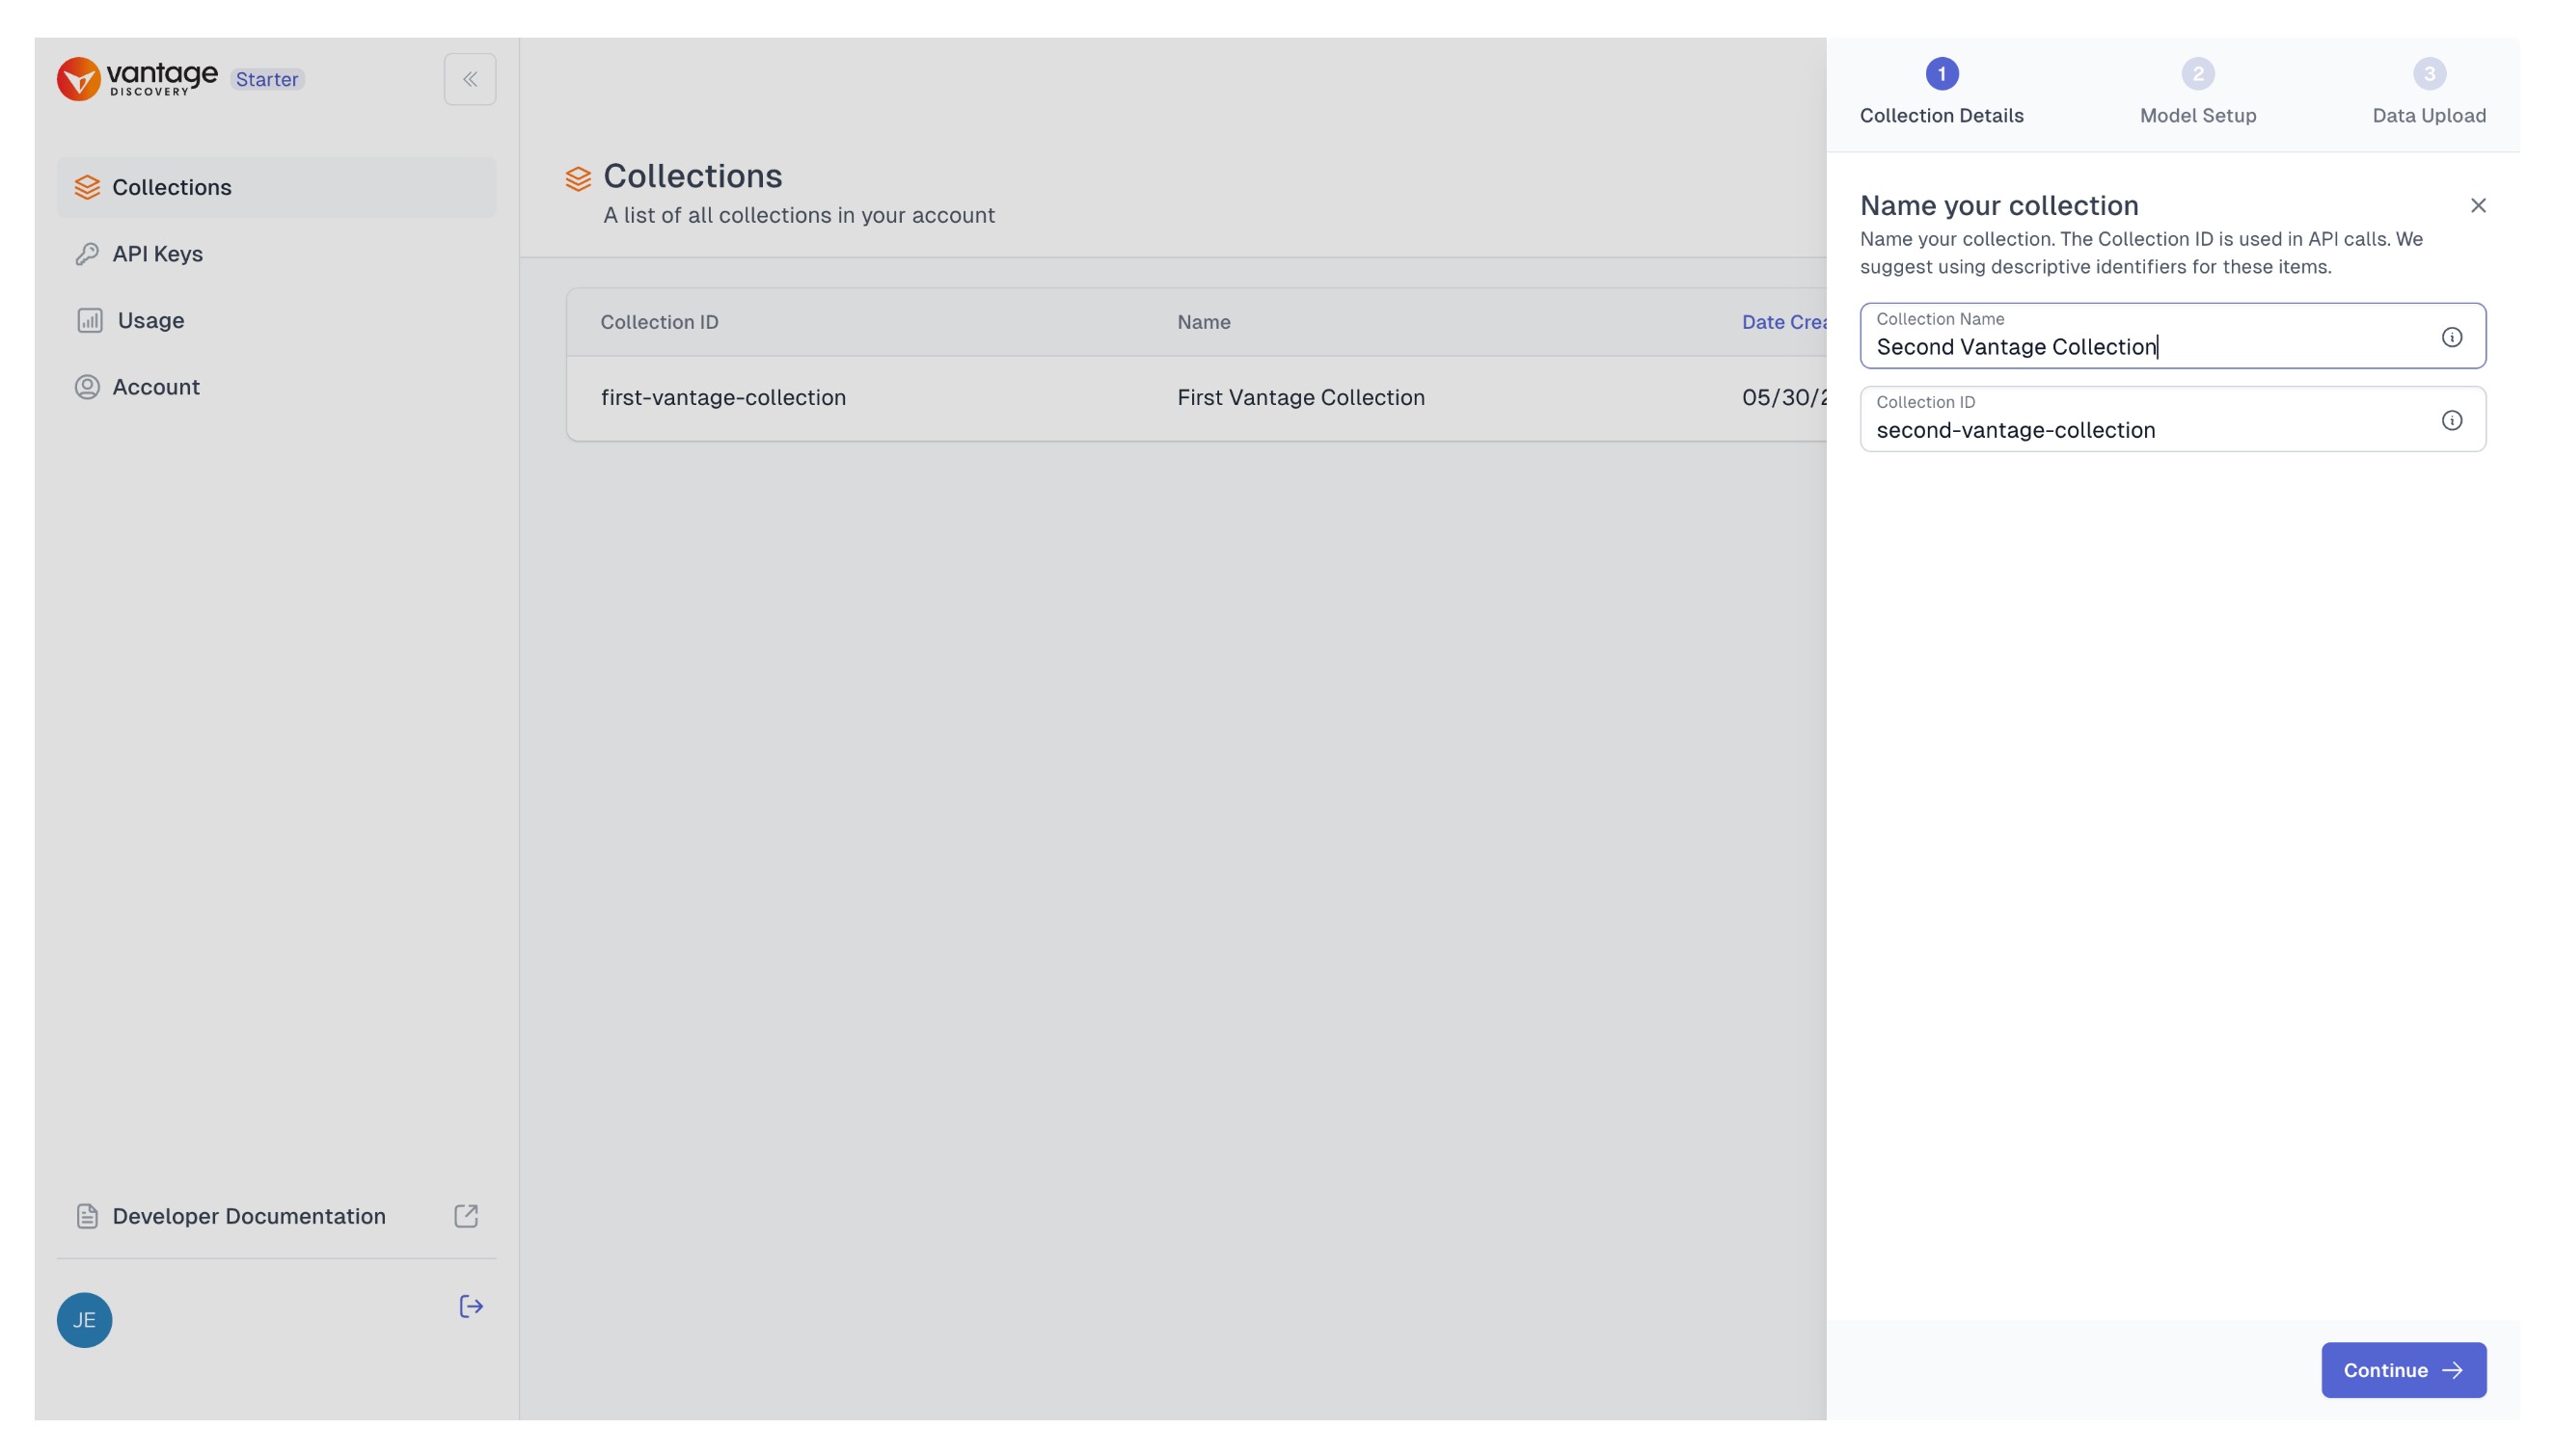
Step 1: Collection Details
When you first open the Collections tab in the Vantage Console UI, you will see the screen below, prompting you to add the main details about your first collection, such as the name and an ID for the collection.
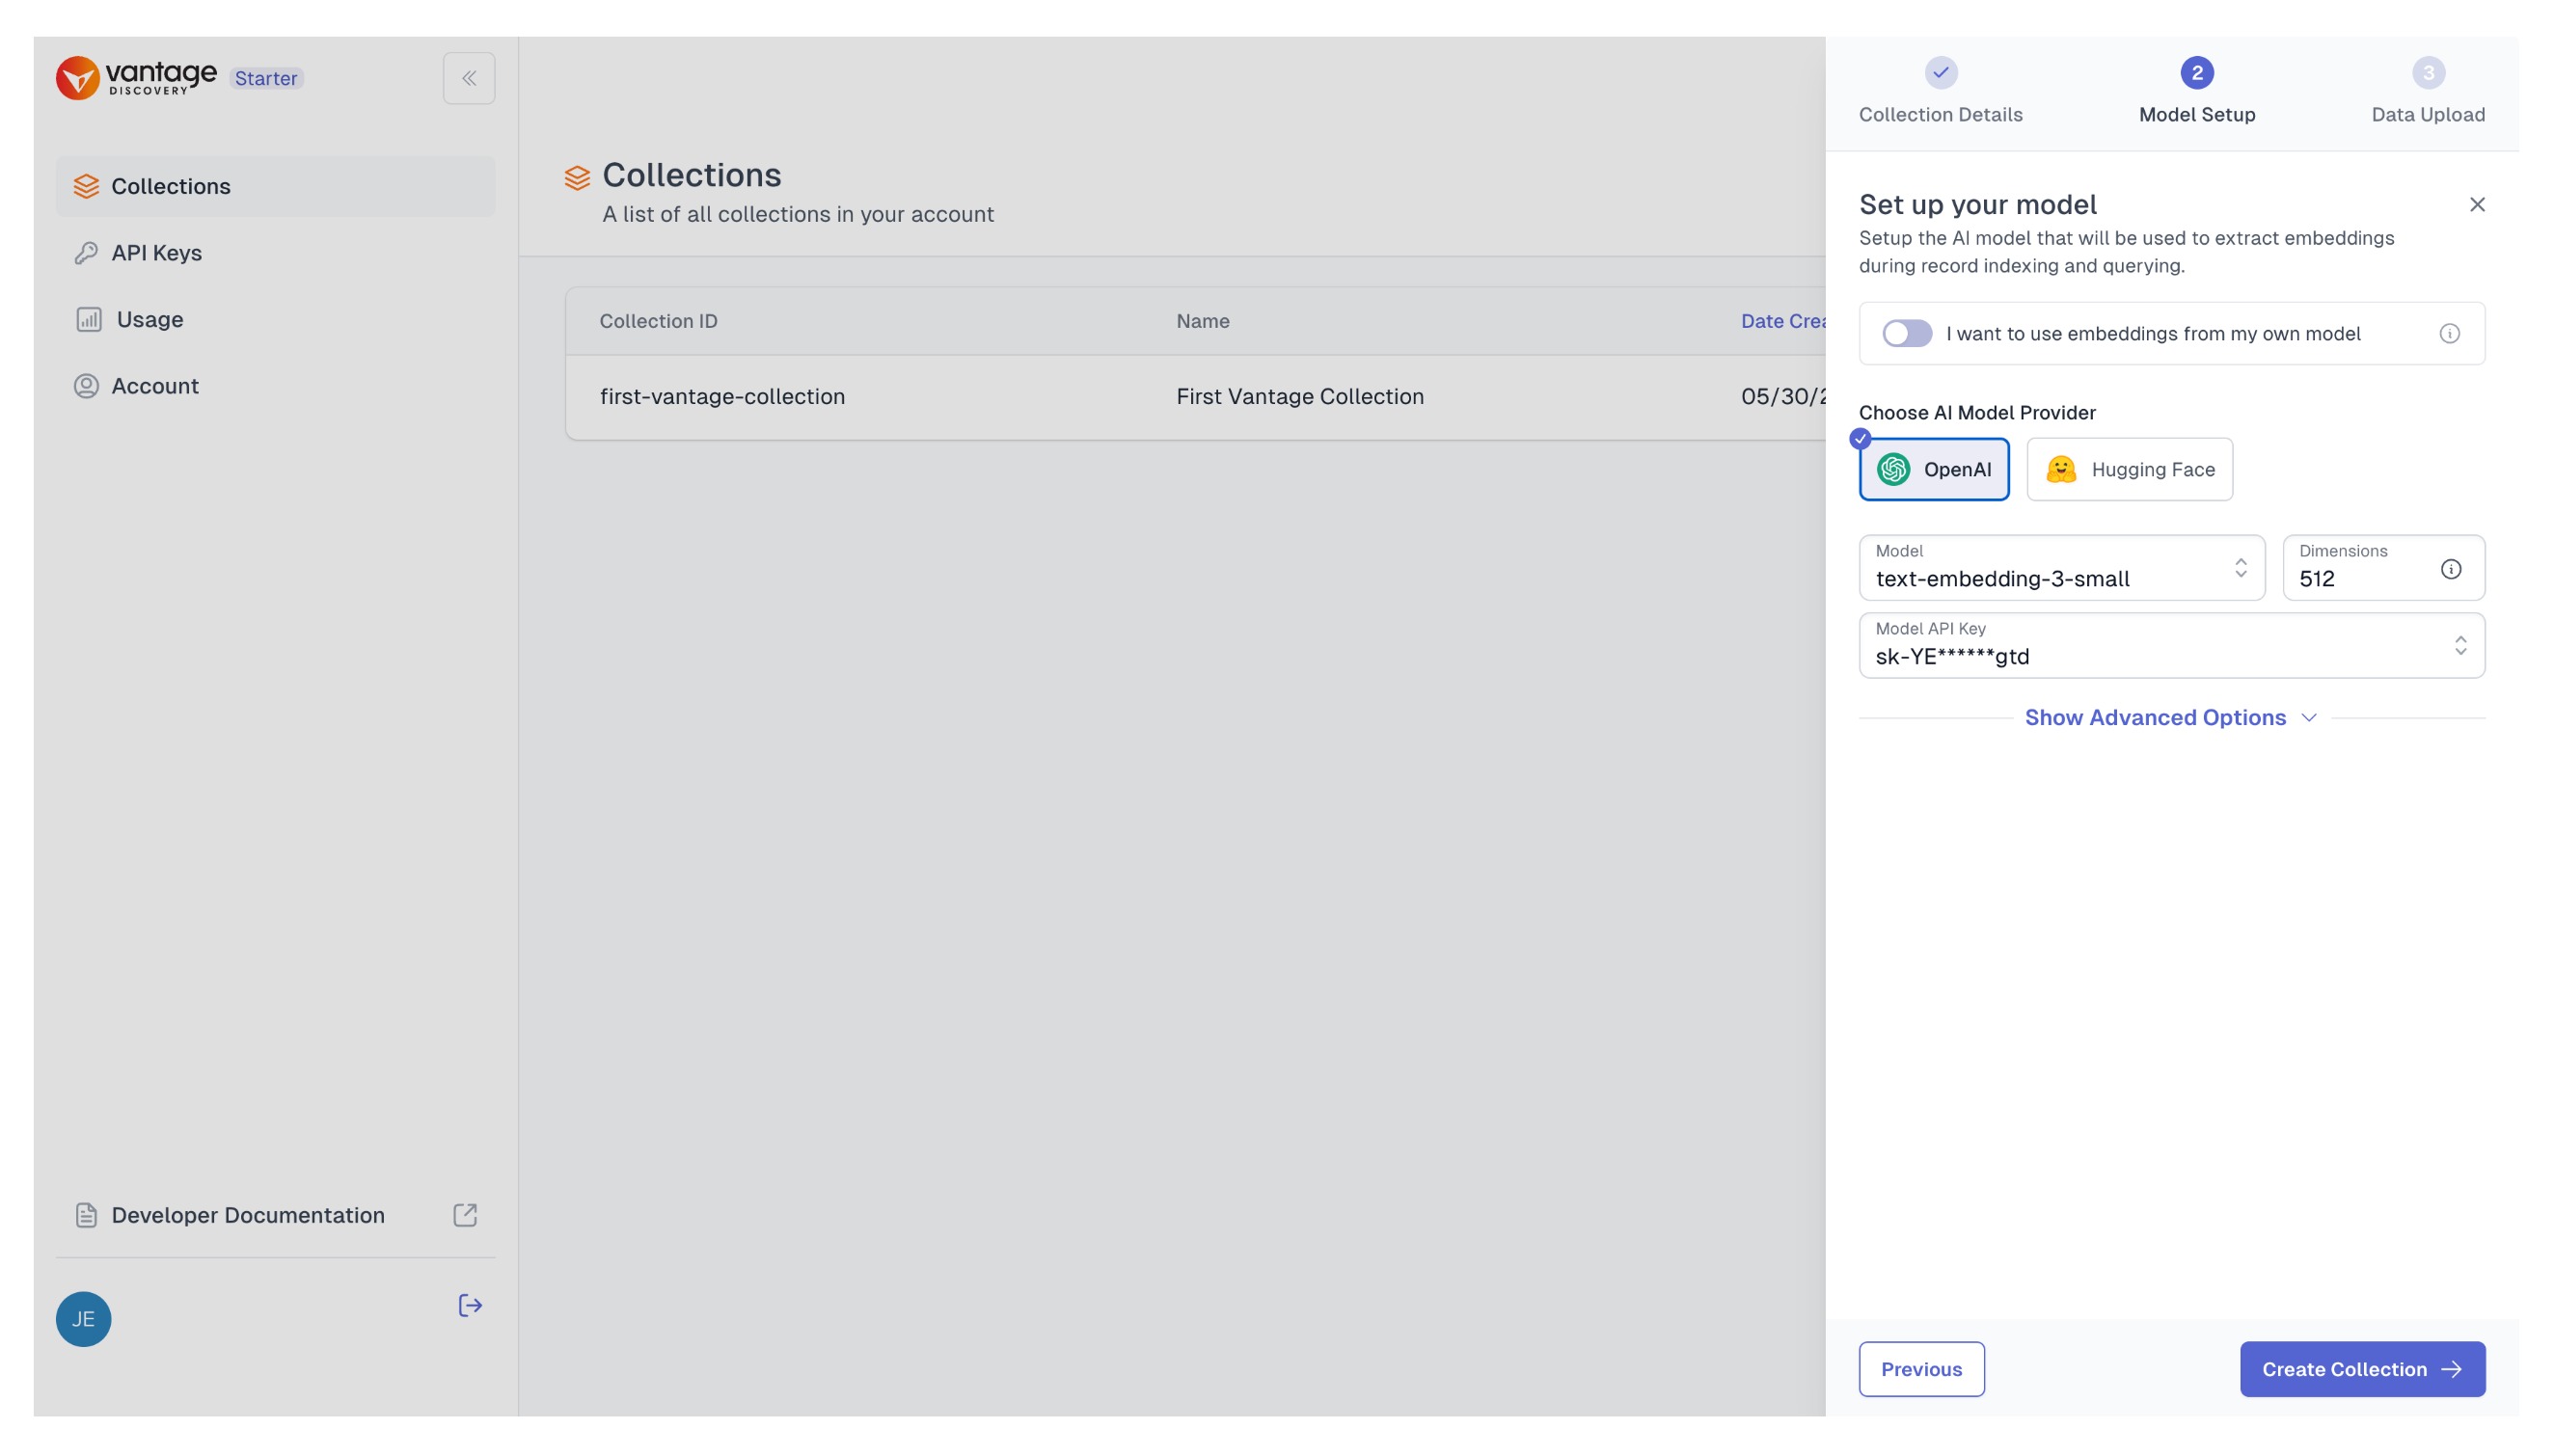
Step 2: Setup Embeddings
The second screen focuses on defining the details of the embeddings that will be stored in your collection.
UPE or VME?
You can choose between two options: providing your own embeddings or allowing the Vantage platform to create them for you. This distinction leads to two types of collections: UPE (User-Provided Embeddings) and VME (Vantage-Managed Embeddings).
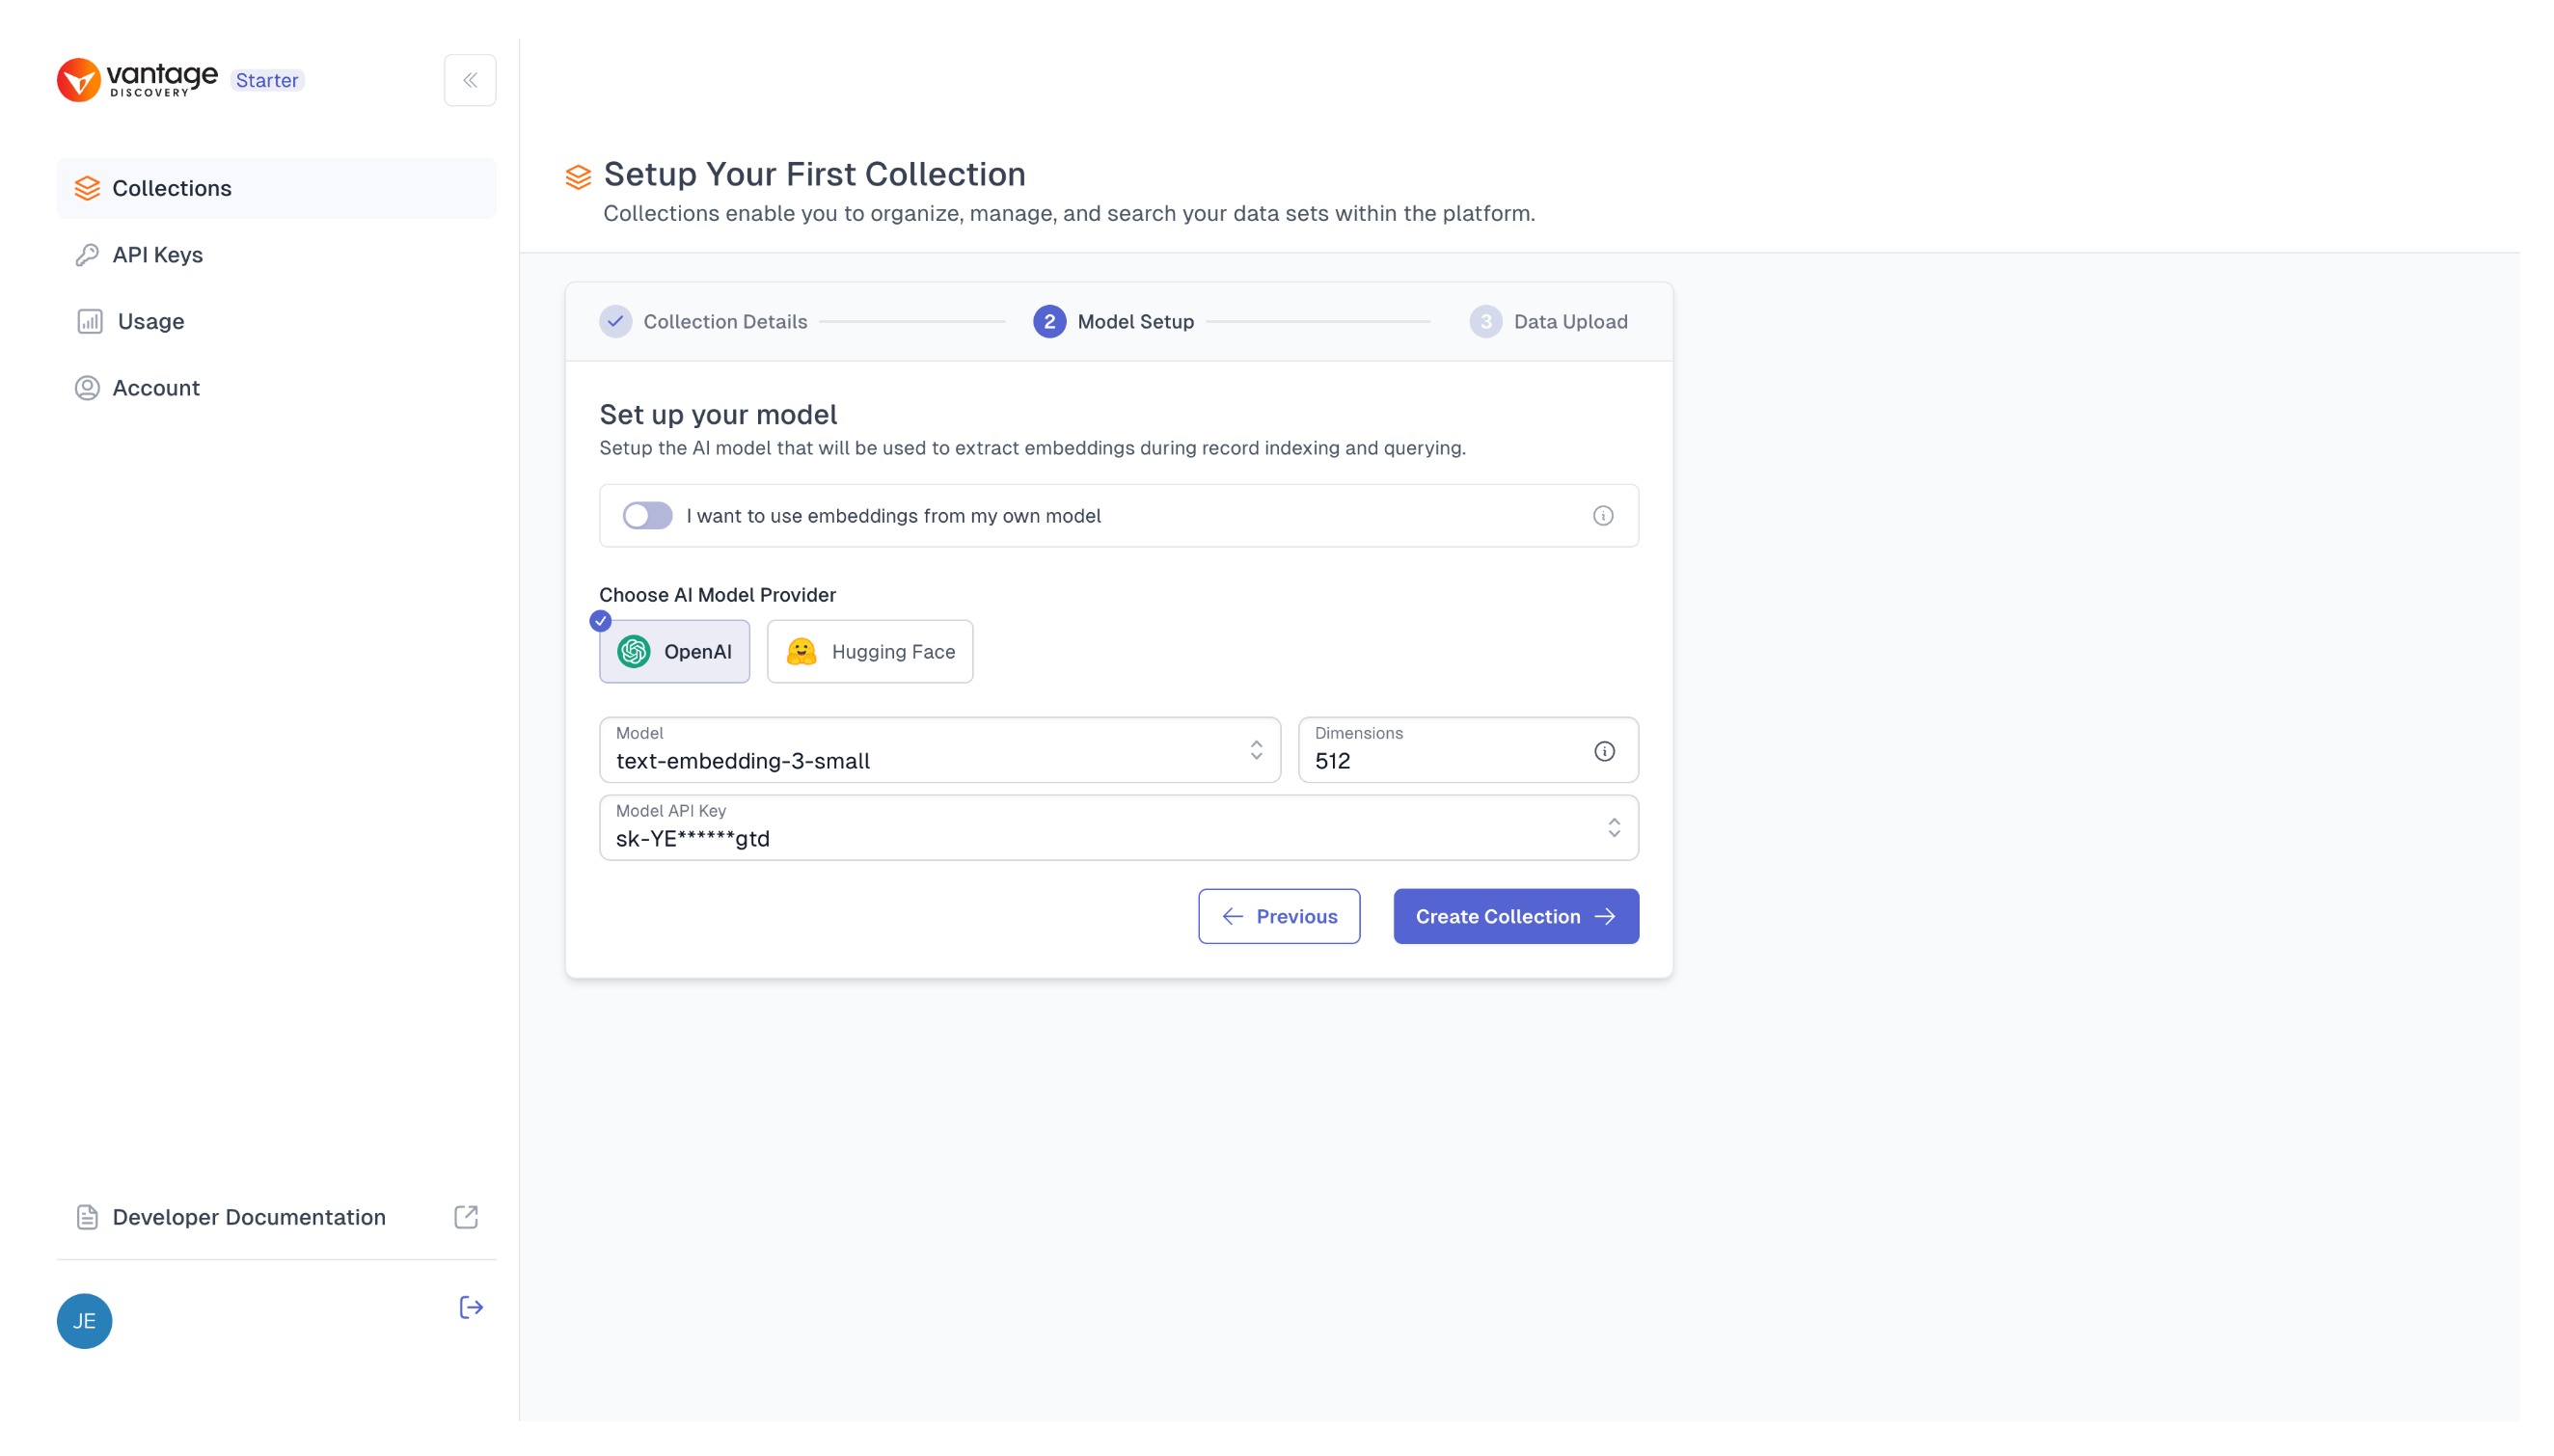
Option 1: Using Vantage Managed Embeddings (VME)
By default, settings for defining a VME (Vantage-Managed Embeddings) collection will be displayed. In this case, you are prompted to choose your AI Model provider; you can select either OpenAI or HuggingFace. Afterward, you'll need to specify the model that matches the model provider and it's embedding dimension and add a secret key accordingly.
External Keys
If you are a first-time user, you will not have a Model API Key created yet. You can create one using the modal window by clicking on the "Add new Model API Key" button, or by navigating to the API Keys tab and creating it there. You will be able to see all your Model API Keys in this tab. For more details, visit Manage Your External Keys.
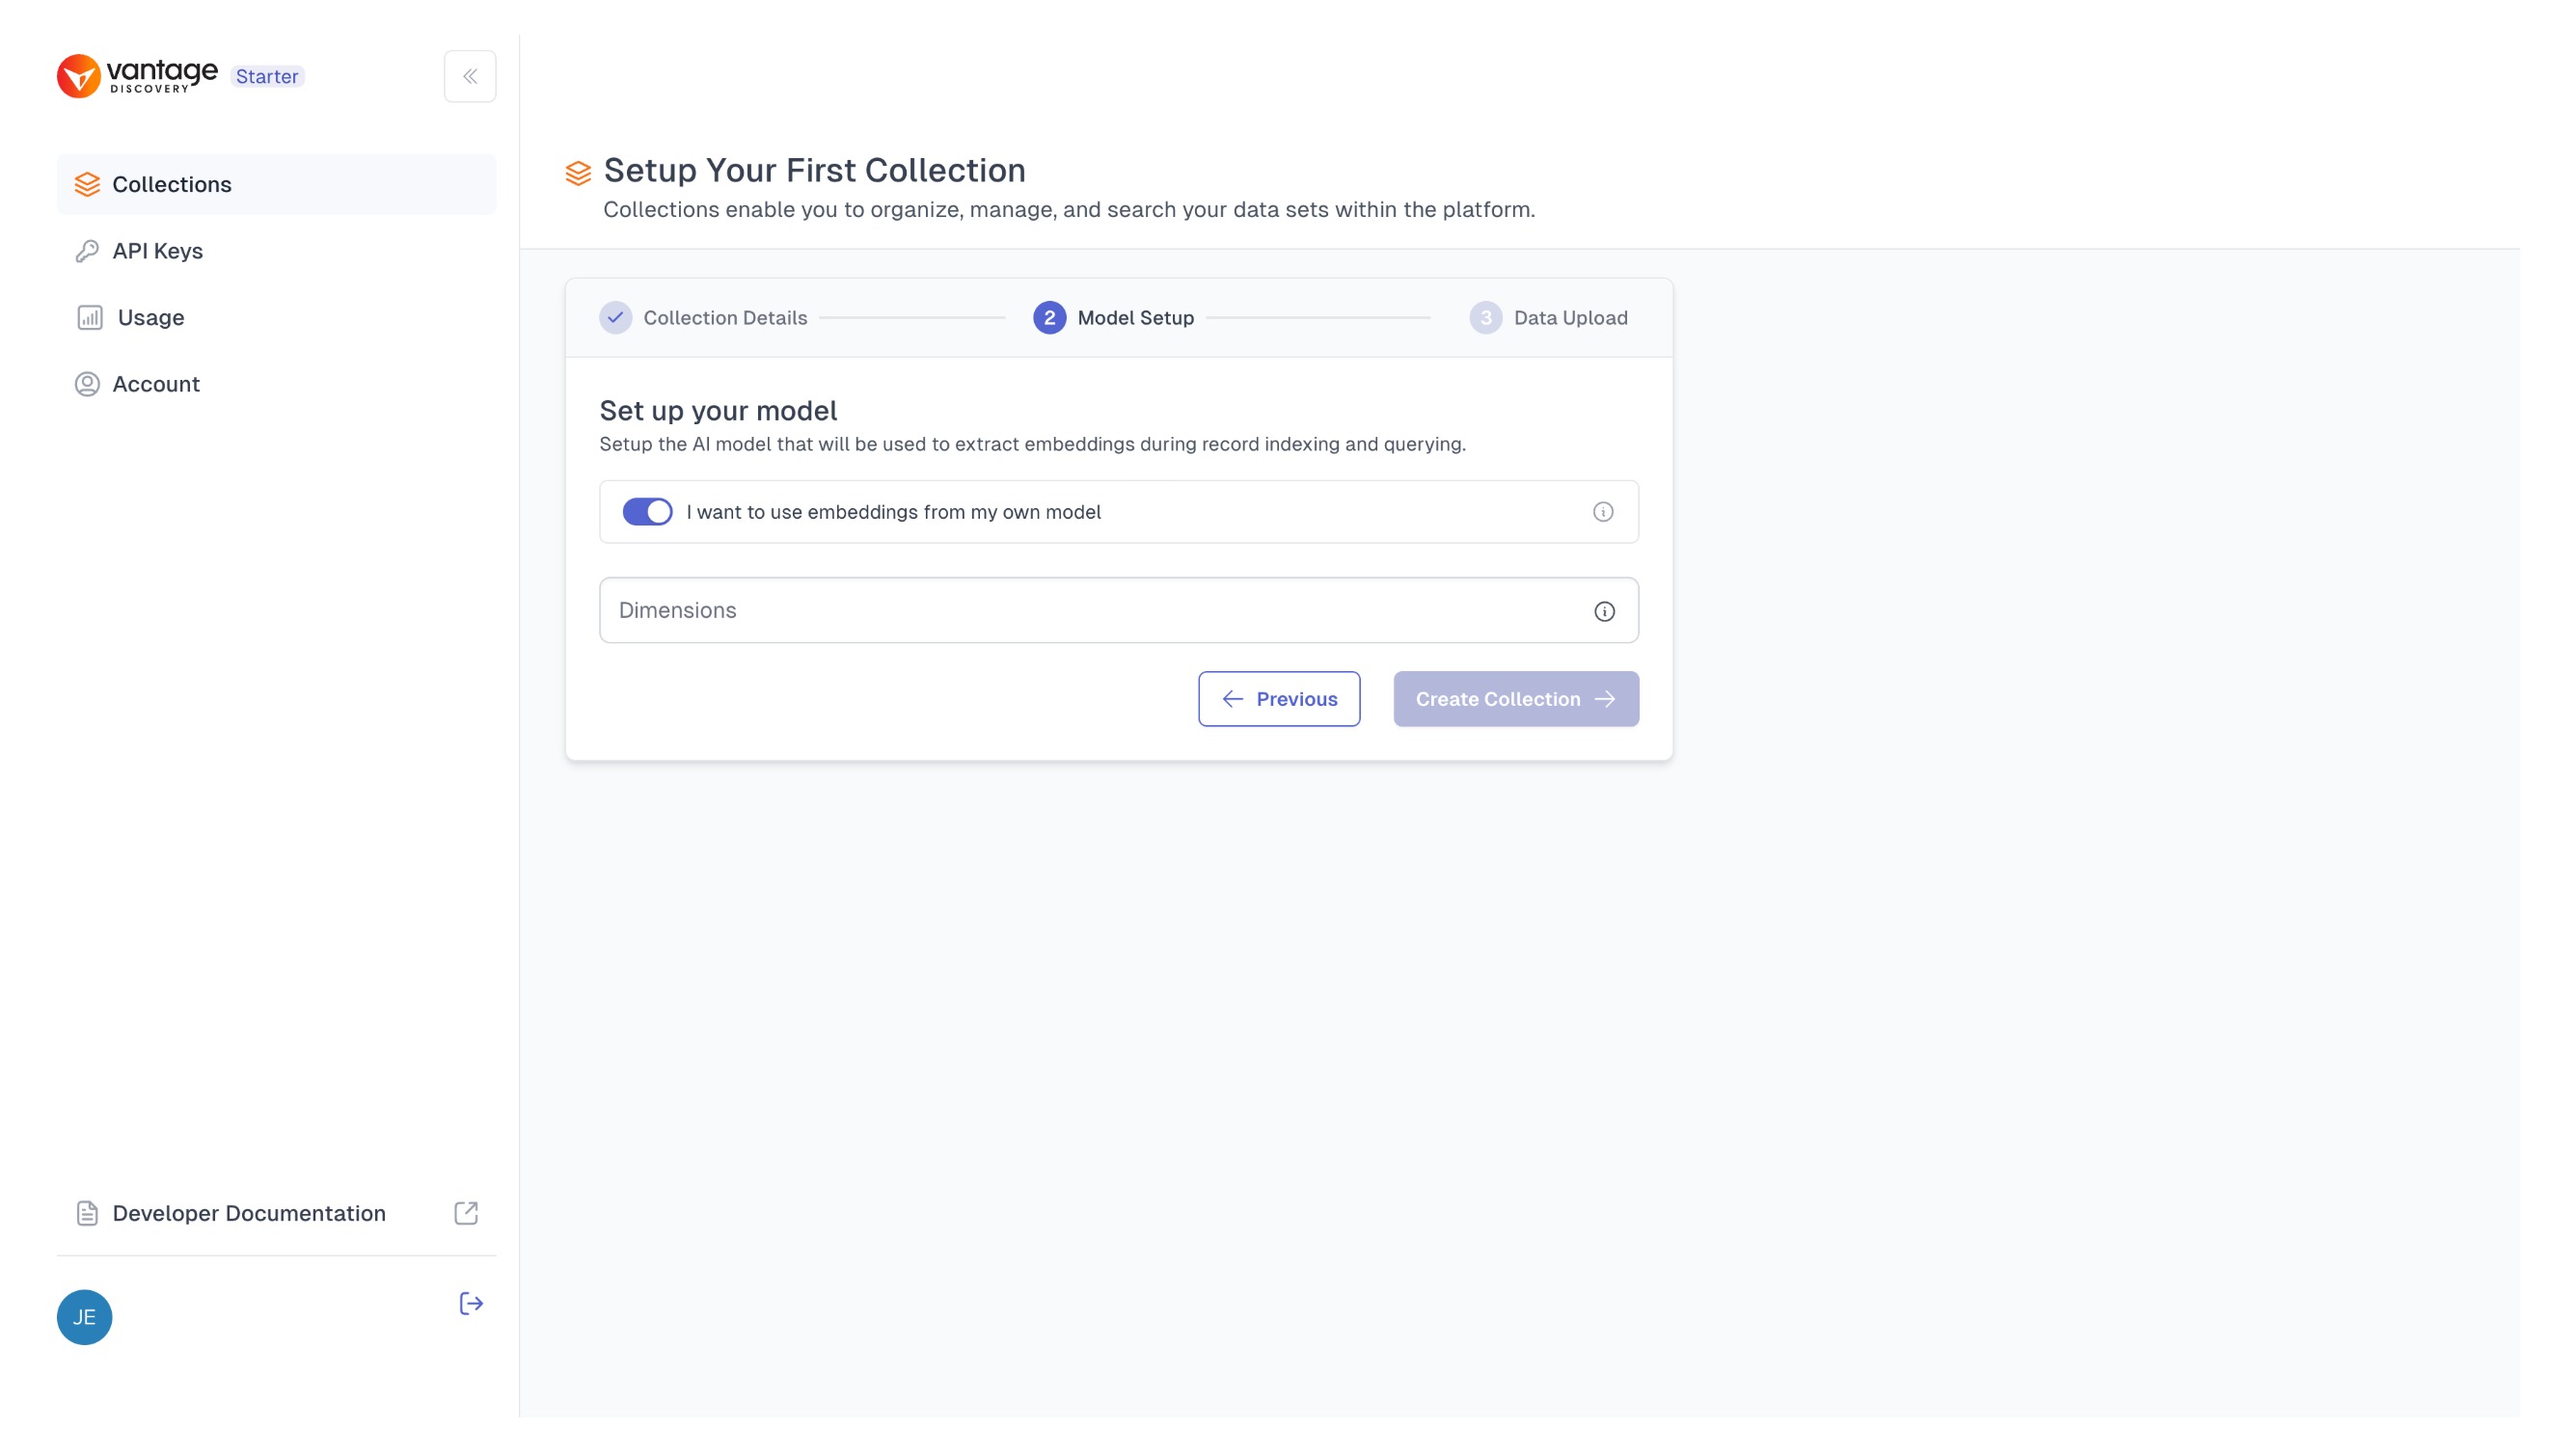
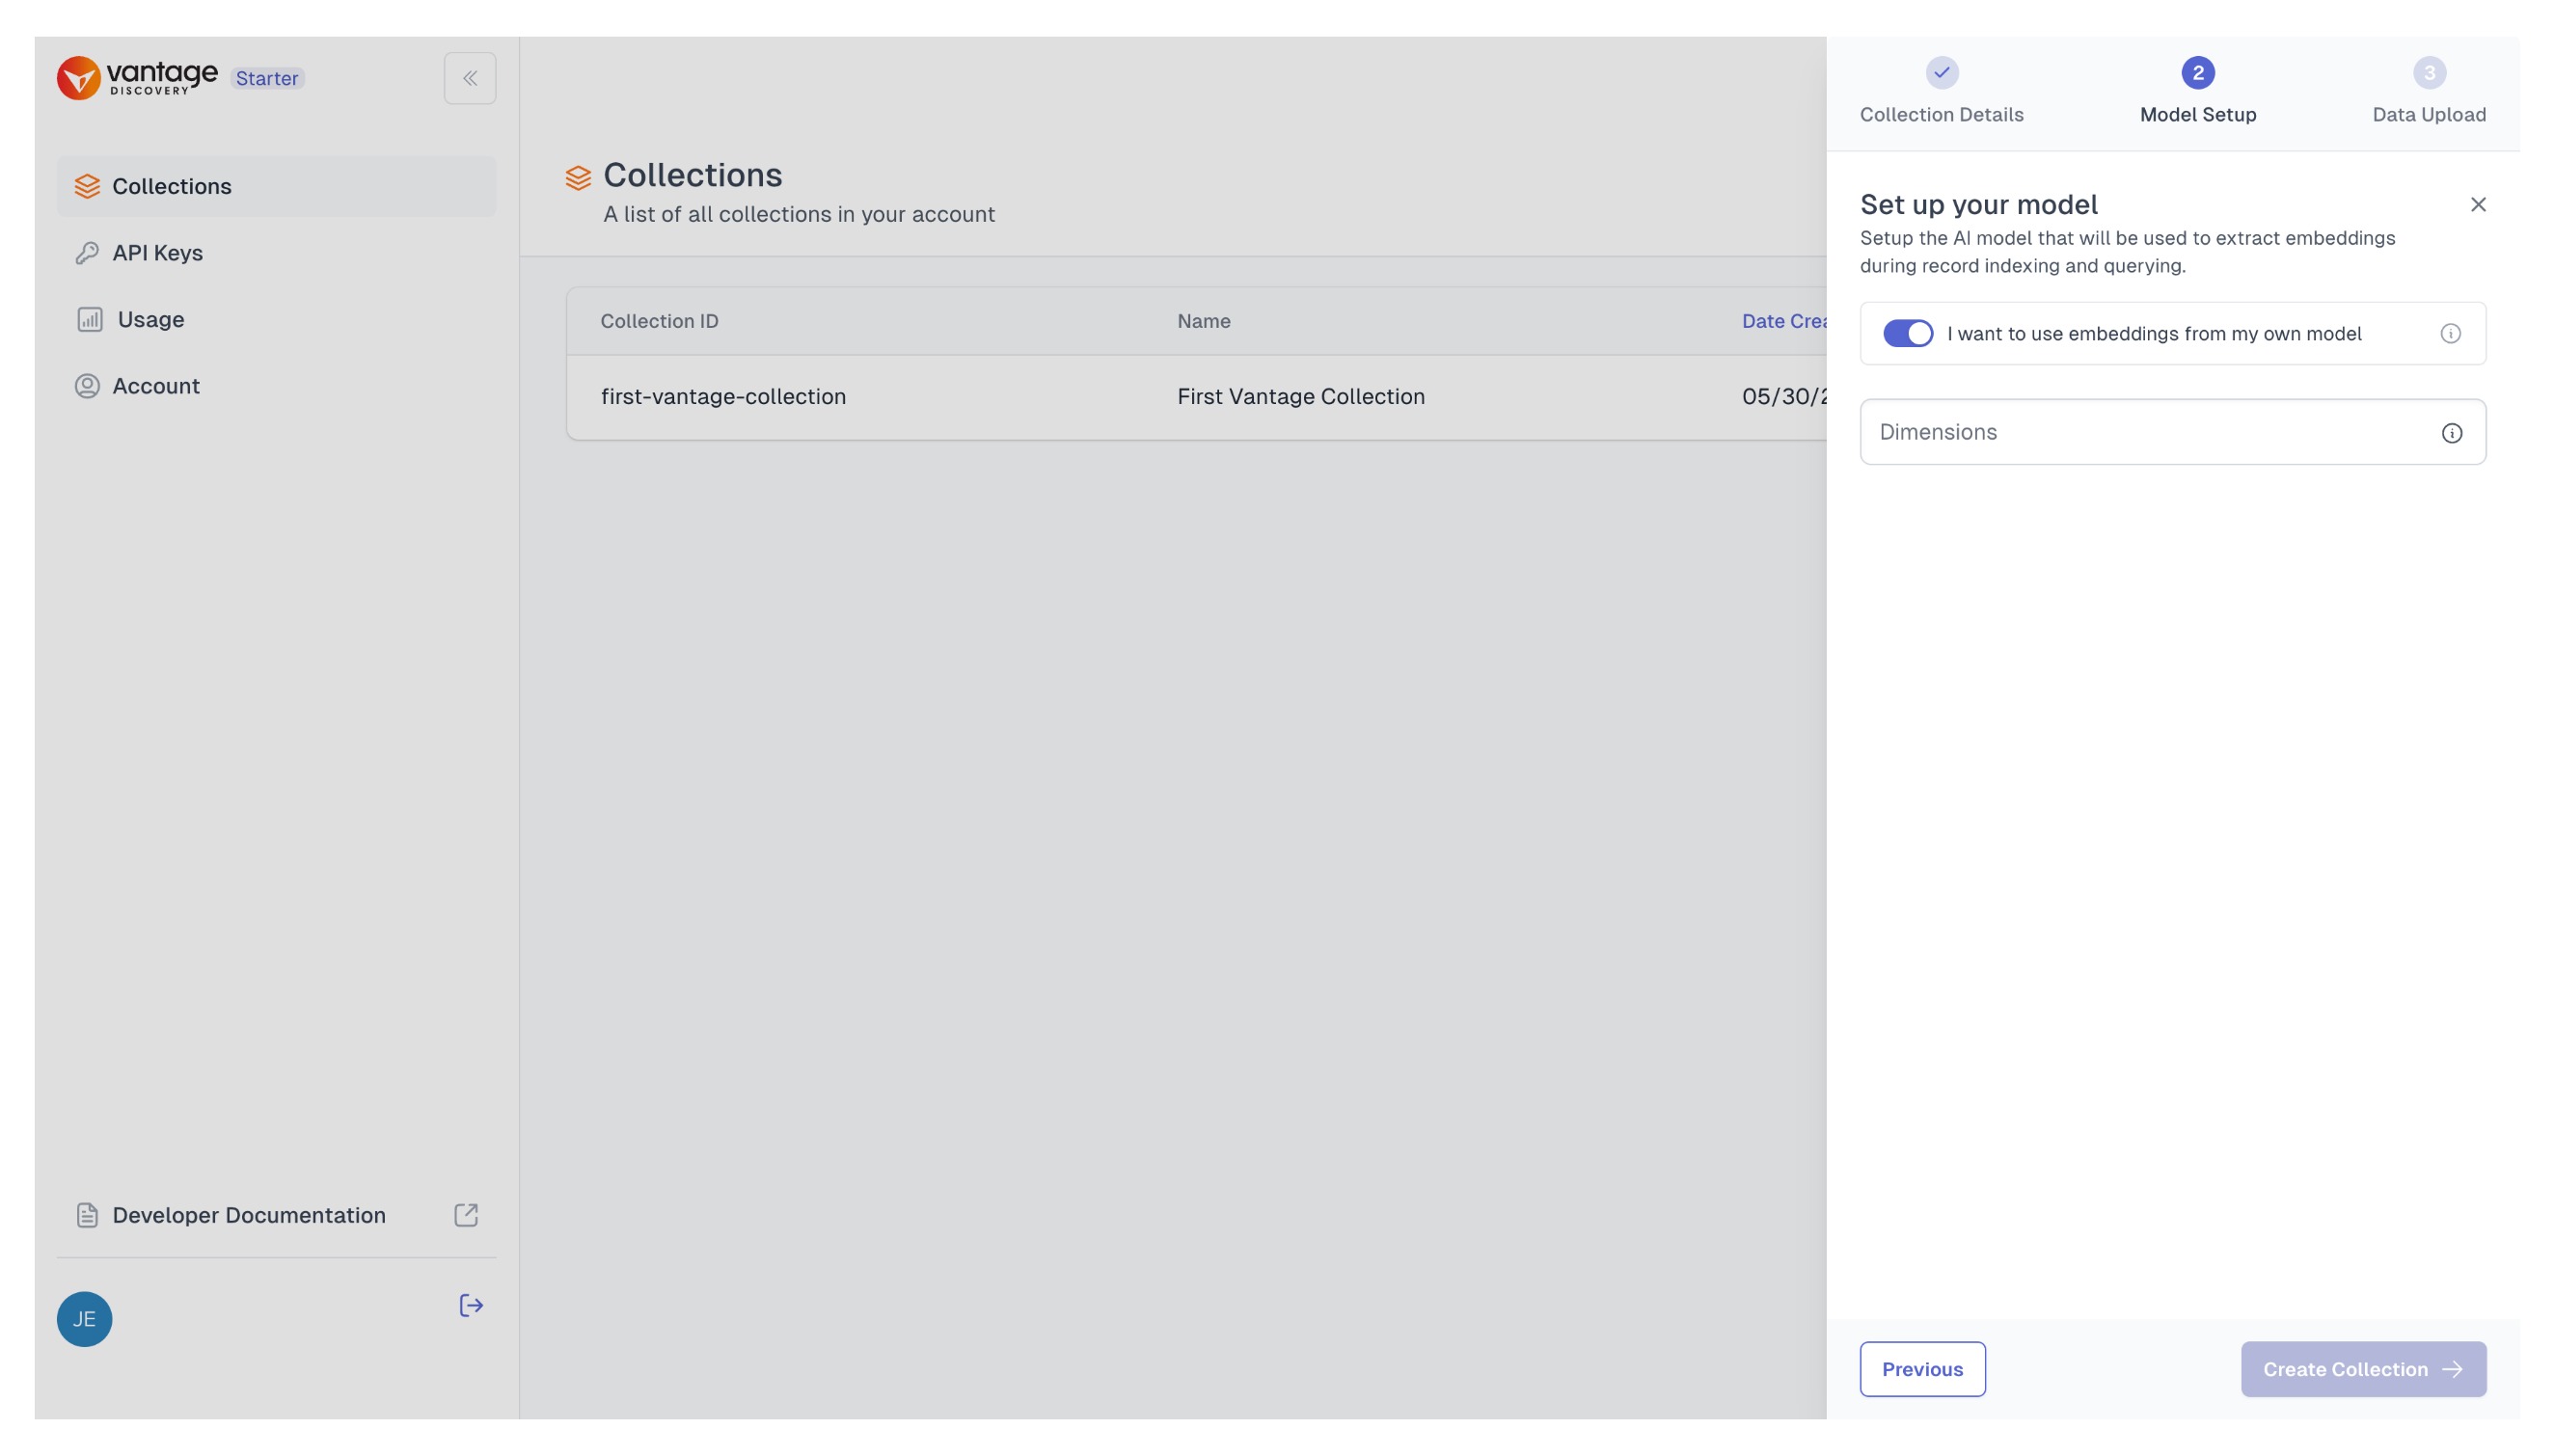
Option 2: Using Your Own Embeddings (User Provided - UPE)
By switching the toggle to "I want to use my own embeddings," you will be presented with a different screen, where you only need to set your embedding dimension value.
Later, when uploading data, your embeddings will need to match this dimension; otherwise, you will encounter an error message indicating an invalid data format.
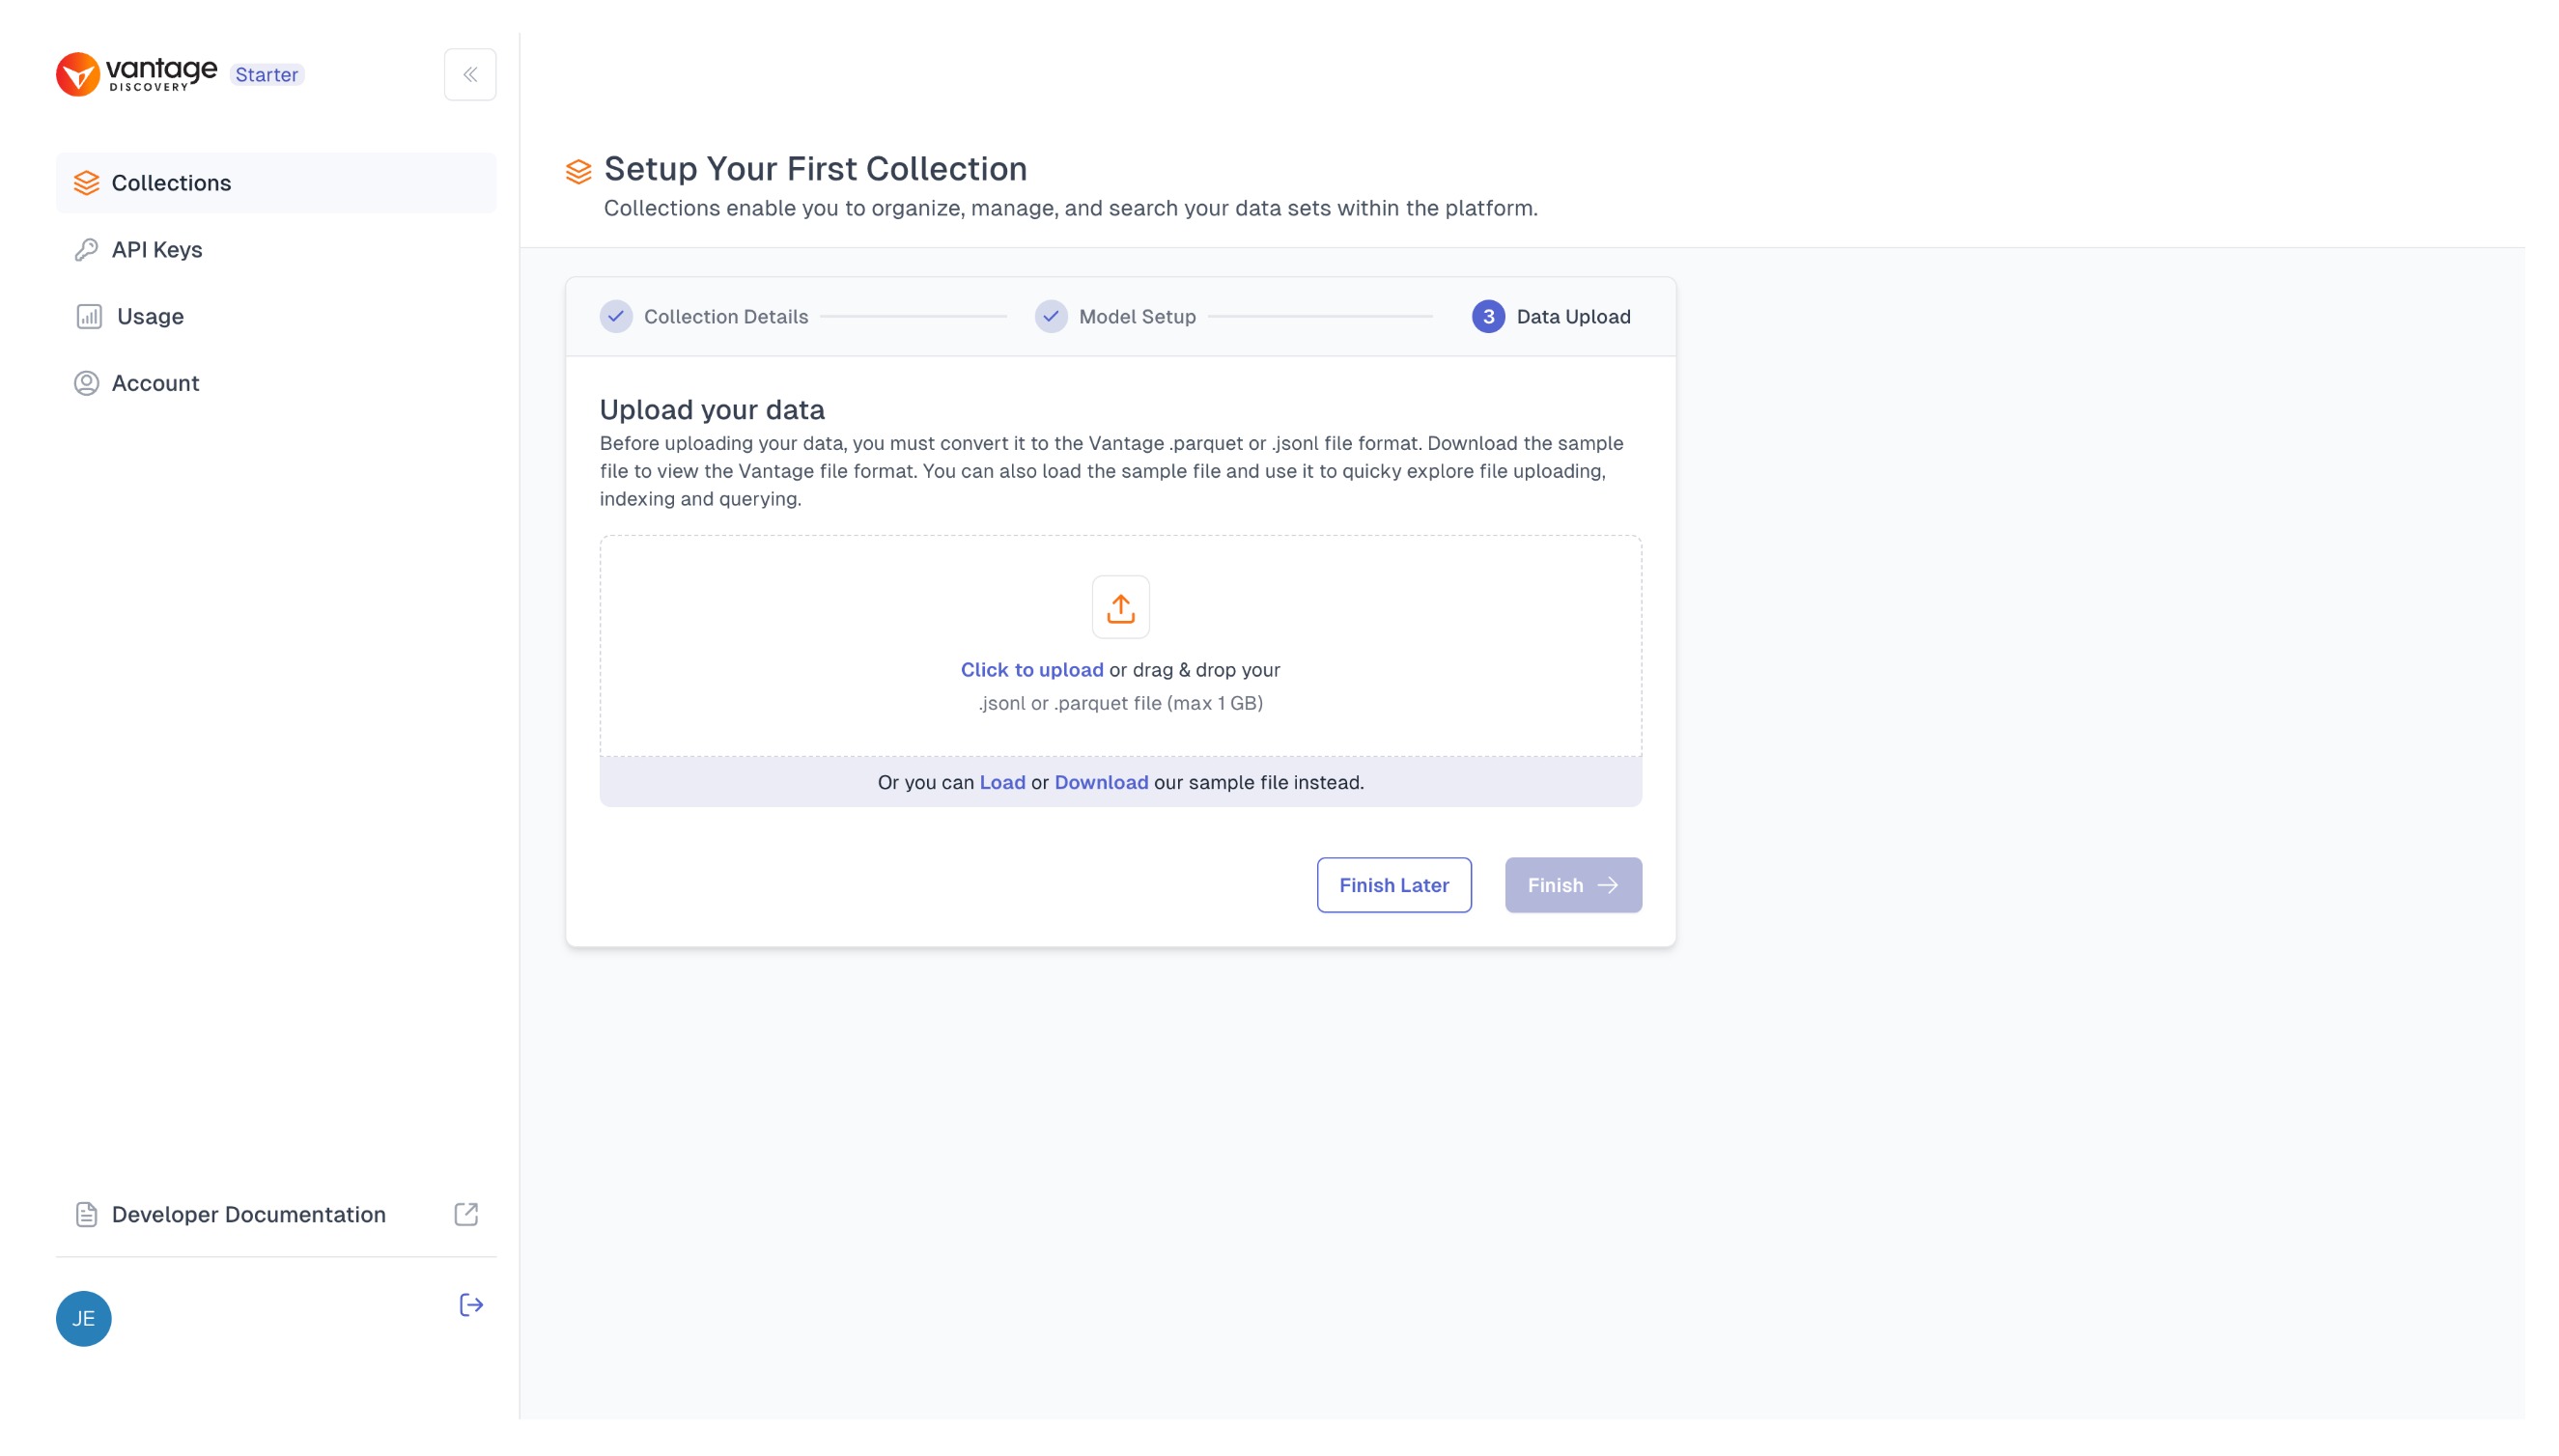
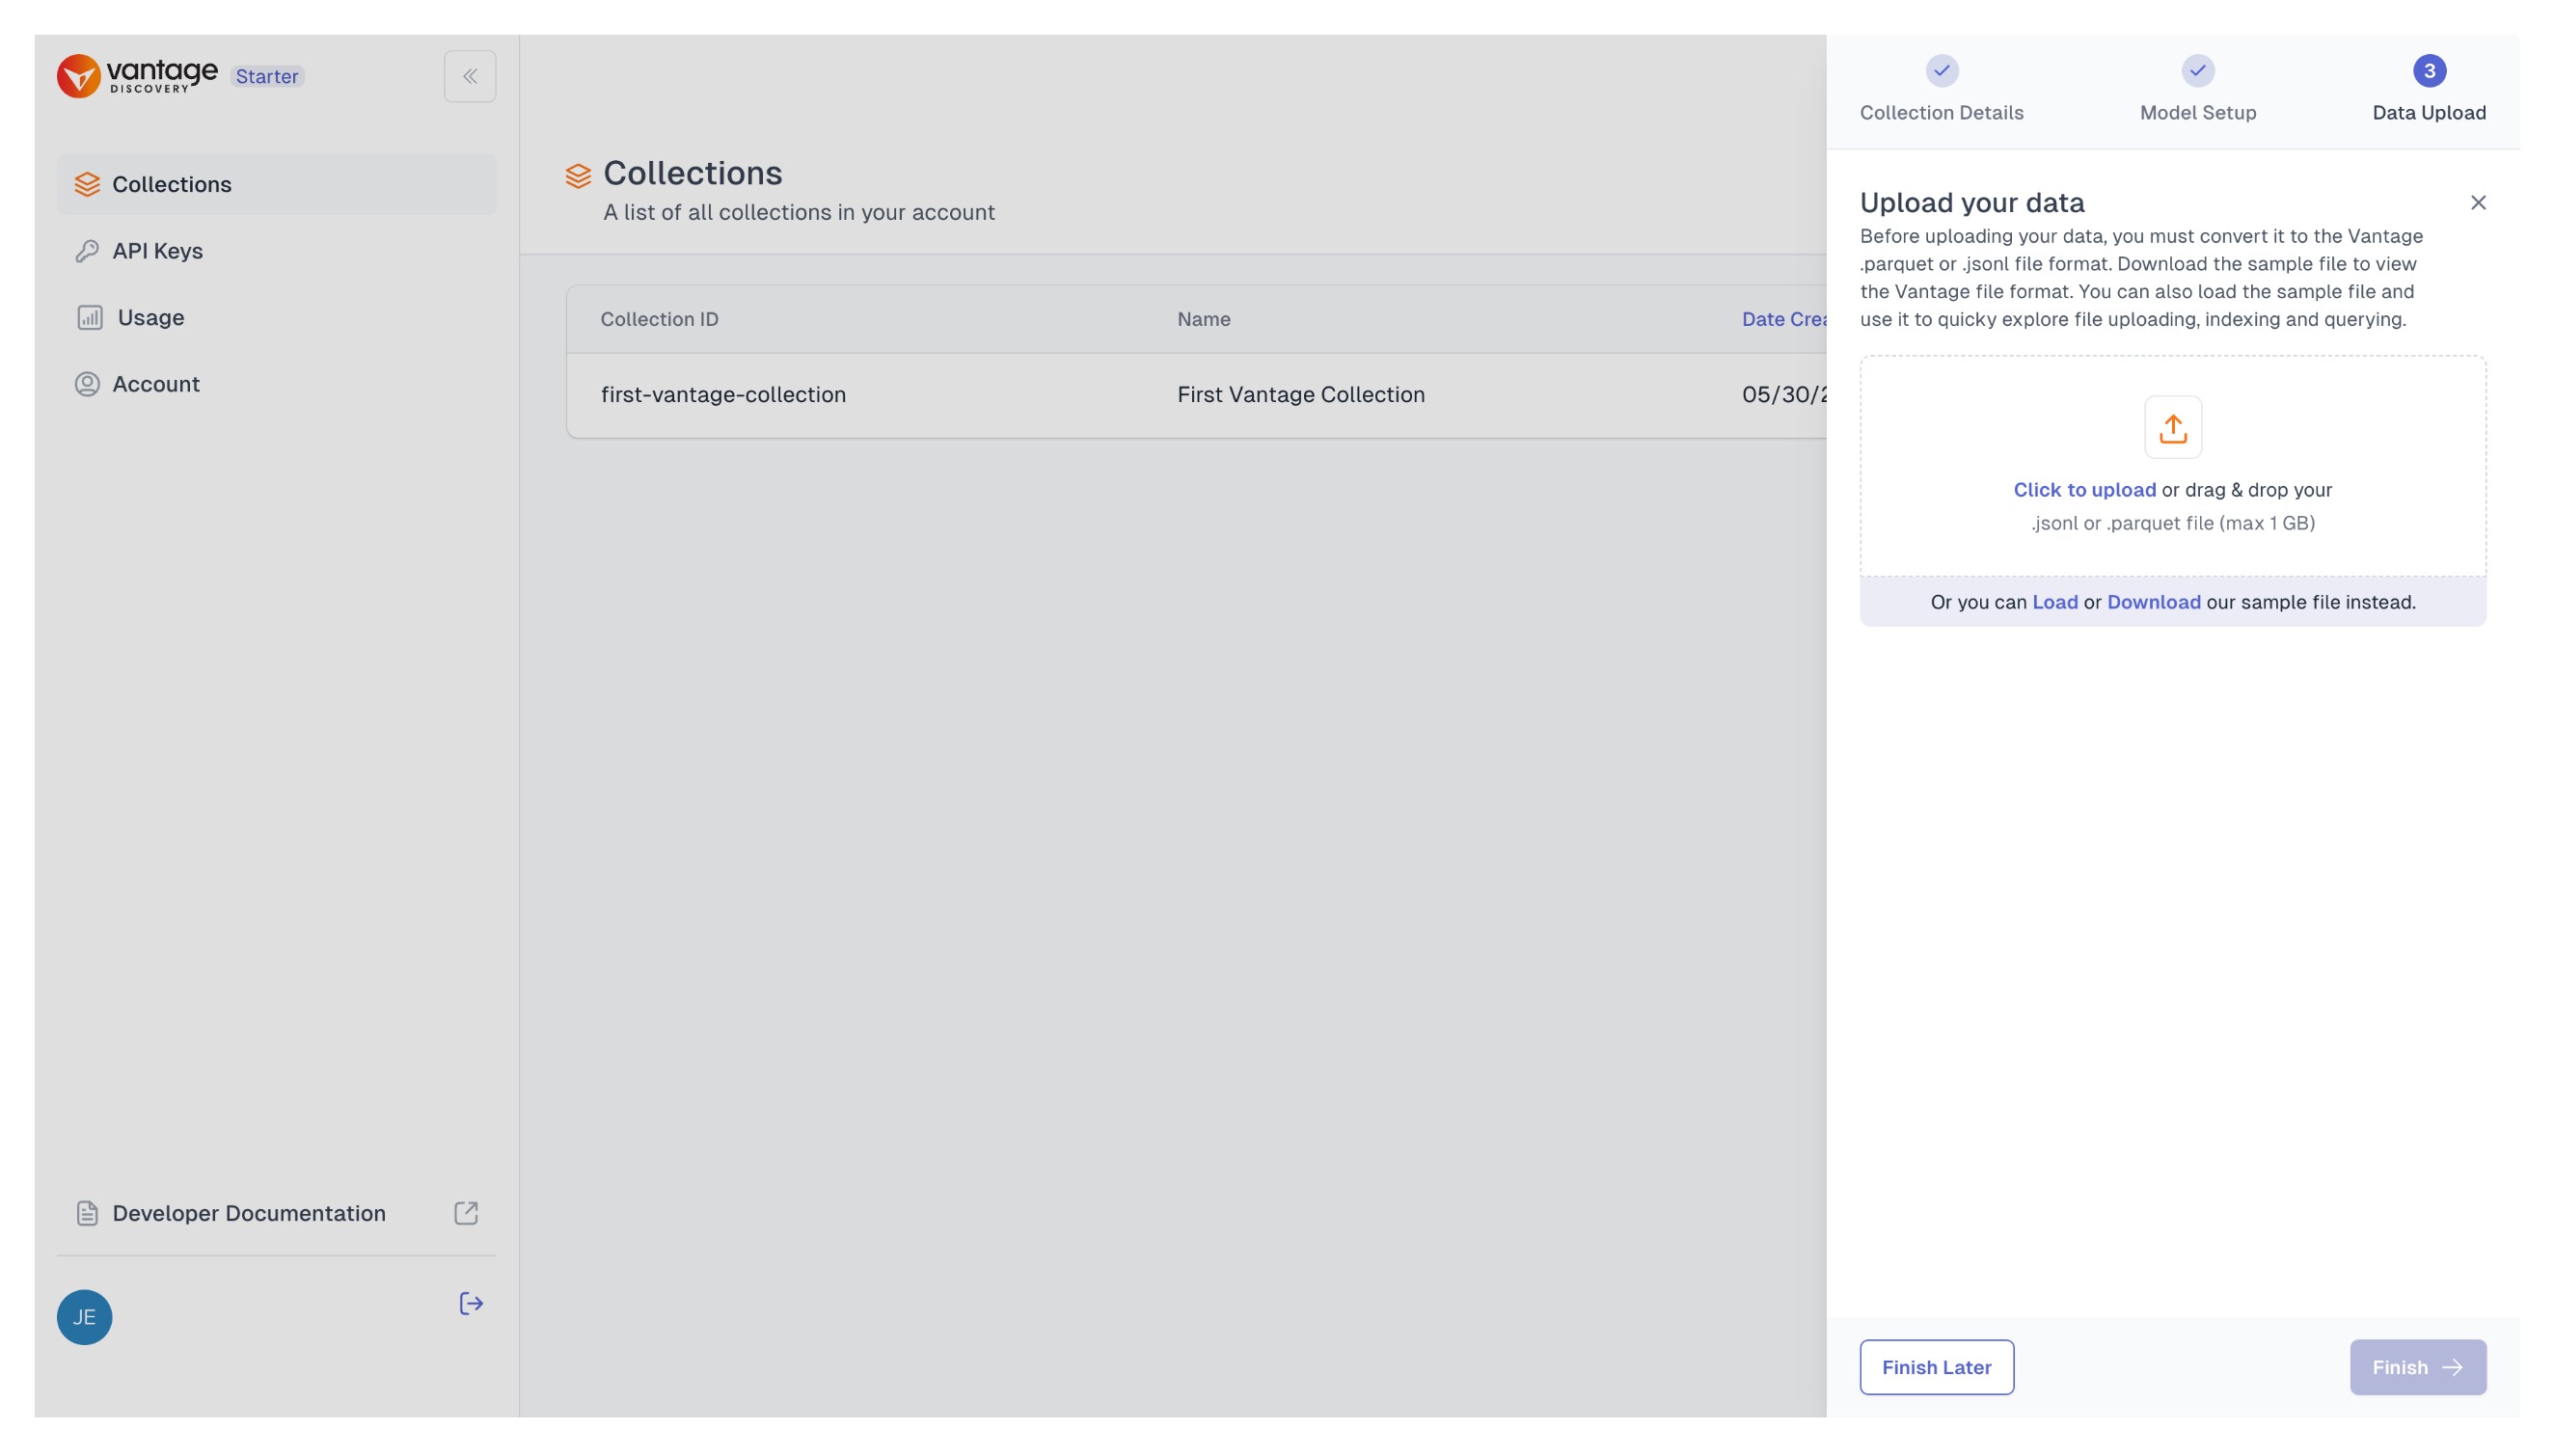
Step 3: Upload Data (Optional)
Optionally, in the final step, you have the option to upload data to your new collection.
To ensure your data is in the correct format, you should follow certain guidelines. For assistance with this, you can refer to our Data Ingestion documentation pages. If you prefer to upload data later, you can simply proceed to create an empty collection.
More details on uploading data
You can find a comprehensive guide on data upload on our Upload Data To Collection page, where all the different options are covered.
Creating Additional Collection
Step 1: Open New Collection Side Window
For users who already have at least one account, the initial view will be slightly different. In that case, you will find a list of previously created collections on the starting page.
If you want to create a new collection, you will need to click on the "New Collection" button at the top right corner. This will lead you to a side window where you will be prompted to add all the collection details and embedding details at once.
Step 2: Setup Collection Details and Embeddings
As mentioned above, in the opened side window, you will be prompted to add collection details, such as the collection name and an ID. Below that, you will be asked to add embedding details.
UPE or VME?
You can choose between two options: providing your own embeddings or allowing the Vantage platform to create them for you. This distinction leads to two types of collections: UPE (User-Provided Embeddings) and VME (Vantage-Managed Embeddings).
Option 1: Using Vantage Managed Embeddings (VME)
By default, settings for defining a VME (Vantage-Managed Embeddings) collection will be displayed. In this case, you are prompted to choose your AI Model provider; you can select either OpenAI or HuggingFace. Afterward, you'll need to specify the model that matches the model provider and it's embedding dimension and add a secret key accordingly.
External Keys
If you are a first-time user, you will not have a Model API Key created yet. You can create one using the modal window by clicking on the "Add new Model API Key" button, or by navigating to the API Keys tab and creating it there. You will be able to see all your Model API Keys in this tab. For more details, visit Manage Your External Keys.
Option 2: Using Your Own Embeddings (User Provided - UPE)
By switching the toggle to "User Provided Embeddings" you will be presented with a different side window options, where you only need to set your embedding dimension value.
Later, when uploading data, your embeddings will need to match this dimension; otherwise, you will encounter an error message indicating an invalid data format.
Once you are happy with the options, proceed by clicking the "Create Collection" button, and your new collection will appear alongside your previously created collections.
Step 4: Check Your Collection Details and Upload Data (Optional)
Optionally, once your collection is created, you can navigate to its details page by clicking on it and upload your data.
To ensure your data is in the correct format, you should follow certain guidelines. For assistance with this, you can refer to our Data Ingestion documentation pages. If you prefer to upload data later, you can simply proceed to create an empty collection.
More details on uploading data
You can find a comprehensive guide on data upload on our Upload Data To Collection page, where all the different options are covered.
Updated about 1 month ago